How To Remotely Connect To Your Raspberry Pi From Windows: A Comprehensive Guide
Getting Started: Essential Prerequisites
Before diving into the remote connection methods, there are a few fundamental prerequisites to ensure a smooth setup.1. Prepare Your Raspberry Pi
- **Operating System:** Make sure you have Raspberry Pi OS (formerly known as Raspbian) installed on your Raspberry Pi. This is crucial for compatibility with most remote access tools.
- **Initial Setup:** For the very first setup, you will need to connect the Raspberry Pi to a monitor, keyboard, and mouse. This allows you to configure network settings, enable necessary services, and install software before you can connect remotely.
- **Network Connection:** Your Raspberry Pi needs to be connected to the network, either via Ethernet or Wi-Fi.
2. Prepare Your Windows PC
- **Operating System:** You'll need a machine running Windows, preferably Windows 10 or higher, to ensure compatibility with the latest remote desktop tools and protocols.
3. Network Configuration
For most local remote access methods, both the Raspberry Pi and the Windows PC need to be on the same local network. If you plan for remote access over the internet, proper configurations such as port forwarding or specialized services will be required.
4. Find Your Raspberry Pi's IP Address
To connect remotely, you'll need your Raspberry Pi's IP address. You can retrieve this by opening a terminal window on your Raspberry Pi (when connected to a monitor) and running the following command:
hostname -IAs a result, an IP address will be assigned to your Raspberry Pi. This IP address will allow us to remotely connect to Raspberry Pi from your Windows 10, Mac, Chrome OS, or Linux PC.
- Kshow123 Alternatives
- Fry99com The Ultimate Guide To Understanding Its Features Benefits And Trustworthiness
- Hdhub4u Trade Download Your Ultimate Guide To Movies And Series
- Kukaj Alternatives
- Sone385 Sub The Ultimate Guide To This Revolutionary Technology
You'll also need your Pi's username (default is ‘pi’) and its password for authentication during connection.
Methods for Remote Connection to Your Raspberry Pi
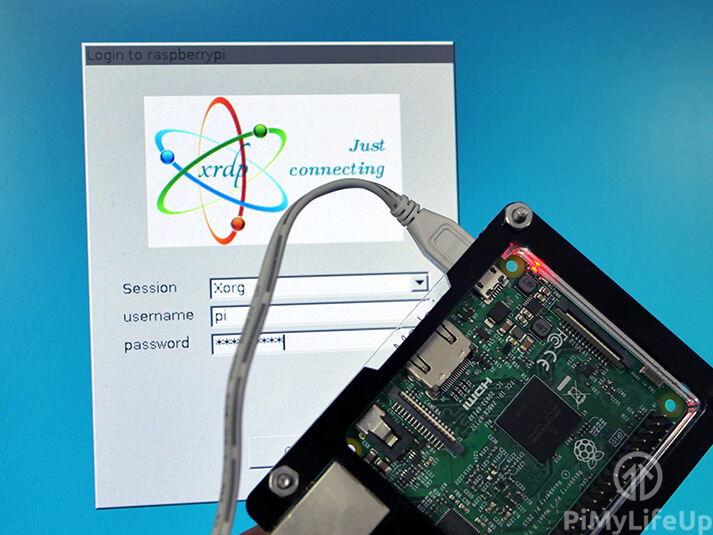
There are several robust methods to connect to your Raspberry Pi from a Windows PC, each offering different levels of access and convenience. We'll explore the most popular ones.1. Remote Desktop Protocol (RDP) with XRDP
The Remote Desktop Protocol (RDP) is the proprietary network protocol developed by Microsoft to connect to a remote desktop computer and access its graphical user interface. This is often the preferred method for users who want a full desktop experience.
Setting up XRDP on Raspberry Pi:
To enable RDP connections, you need to install the XRDP service on your Raspberry Pi or Linux device. In a terminal window on your Raspberry Pi, run the following commands:
- Explore Fry99com Adult Content More 2024 Guide
- Ifsa Turk Sotwe The Ultimate Guide To Unlocking Your Career In The World Of Turkish Aviation
- Ella Rose Gaines Rising Star In The Entertainment World
- Unveiling The Mystique The Allure Of Sophie Rain Naked
- Darla Eliza Nude Leaks Photos Uncensored
sudo apt update sudo apt install xrdpOnce installed, XRDP will typically start automatically. If you encounter issues, a quick restart of your Raspberry Pi might resolve them.
Connecting from Windows:
Connecting to the Raspberry Pi over RDP is a simple process on the Windows operating system. This guide shows how to set up a remote desktop connection with a Raspberry Pi using RDP on a Windows PC.
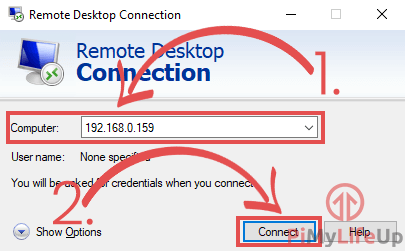
- On your Windows PC, open the "Remote Desktop Connection" application. You can find it by typing "Remote Desktop" in the Windows search bar.
- In the "Computer" field, enter the IP address of your Raspberry Pi.
- Click "Connect".
- You will be prompted for credentials. Enter your Raspberry Pi's username (default is 'pi') and its password.
- Click "OK" or "Connect".
Now that we’ve got everything set up, connecting locally to your Raspberry Pi’s desktop is pretty straightforward. You should now see your Raspberry Pi's desktop environment on your Windows PC.
Troubleshooting RDP Connections:
- **Connection Issues:** Restart the Raspberry Pi and the Windows Remote Desktop to reset the connection.
- **Compatibility:** Update the software on the Raspberry Pi and Windows Remote Desktop to address any compatibility issues.
- **Firewall:** Check the firewall settings on the Windows Remote Desktop to ensure that the Raspberry Pi is allowed to connect via RDP.
2. Secure Shell (SSH) for Command Line Access
SSH (Secure Shell) is a protocol that allows secure remote access to your Raspberry Pi’s command line. This method is ideal for those who prefer to work with the terminal, execute commands, manage files, or run scripts without a graphical interface. By default, SSH may be disabled for security reasons, so you might need to enable it first via `sudo raspi-config` -> Interface Options -> SSH.
Connecting from Windows:
Windows 10 and newer versions have a built-in SSH client, or you can use third-party tools like PuTTY.
Using Windows Command Prompt or PowerShell:
- Open Command Prompt or PowerShell.
- Type the following command, replacing `your_pi_ip_address` with your Raspberry Pi's actual IP:
ssh pi@your_pi_ip_address - You will be asked to confirm the connection (type 'yes' if it's the first time connecting).
- Enter your Raspberry Pi's password when prompted.
Using PuTTY (if you prefer a GUI client):
- Download and install PuTTY.
- Launch PuTTY.
- In the "Host Name (or IP address)" field, enter your Raspberry Pi's IP address.
- Ensure the "Port" is set to 22 and "Connection type" is SSH.
- Click "Open".
- Enter your username ('pi') and password when prompted.
Now click new site and you can give the site a custom name, such as ‘Raspberry Pi’. Enter ‘raspberrypi’ in the host field, ‘pi’ in the user field, and your Raspberry Pi password in the password field. Click connect and you will connect remotely to the Raspberry Pi.
3. Virtual Network Computing (VNC)
VNC is another popular method for graphical remote access. Similar to RDP, it allows you to see and interact with your Raspberry Pi's desktop environment. You'll need VNC server software on your Raspberry Pi and a VNC viewer on your Windows PC.
Setting up VNC on Raspberry Pi:
Raspberry Pi OS often comes with RealVNC server pre-installed. You can enable it via `sudo raspi-config` -> Interface Options -> VNC.
Connecting from Windows:
Download and install RealVNC Viewer on your Windows PC. With both devices now running VNC software, you can connect from your Pi to your Windows desktop for remote access, or more relevantly for this guide, from your Windows PC to your Pi.
- Launch the VNC Viewer on your Windows PC.
- In the address bar, enter your Raspberry Pi's IP address and press Enter.
- You will be prompted for your Raspberry Pi's username ('pi') and password.
- Click "OK" to establish the connection.
You should now see your Raspberry Pi's desktop.
4. NoMachine
NoMachine is a powerful and user-friendly remote desktop solution known for its speed and ease of setup. It offers a smooth desktop experience, even over slower connections.
Setting up NoMachine:
Install the NoMachine software on both your Raspberry Pi and your Windows PC. You can download the appropriate packages from the official NoMachine website.
Connecting from Windows:
- Launch the NoMachine client on your Windows PC.
- NoMachine will automatically detect your Raspberry Pi on the network.
- Double click on the Raspberry Pi shown in NoMachine to connect.
- Give the credentials (your Raspberry Pi's username and password) and you will be logged in.
Out of the 5 methods, my favorite is NoMachine due to its simplicity and performance.
5. remote.it for Anywhere Access
If you need to access your Raspberry Pi from outside your local network without complex router configurations like port forwarding, remote.it is an excellent solution. It creates secure tunnels to your devices, making them accessible from anywhere with an internet connection.
Setting up remote.it on Raspberry Pi:
Install the remote.it agent on your Raspberry Pi. This usually involves running a script provided by remote.it and registering your device with their service.
Connecting from Windows:
- After installing the agent on your Pi, you'll need to register it. Click register again to add Raspberry Pi to your remote.it account.
- Next, you’ll learn how to configure a remote.it service that is compatible with XRDP (or SSH, VNC) so that you can easily connect to your Pi from outside of your local network.
- From your remote.it account dashboard (accessible via a web browser on your Windows PC), you will see your registered Raspberry Pi. The services window displays the three default services: SSH, VNC, and remote.it admin panel.
- Start a connection for your desired service (e.g., RDP, SSH, or VNC) through the remote.it interface.
You now connect to Raspberry Pi via remote.it, providing a secure and convenient way to access your Pi from anywhere in the world.
Conclusion
The ability to remotely connect to your Raspberry Pi from a Windows PC is a game-changer for many projects and everyday use cases. Whether you need full graphical desktop access with RDP or VNC, command-line control with SSH, the seamless experience of NoMachine, or global accessibility with remote.it, there's a method tailored to your needs. Connect includes the ability to screen share on Raspberry Pi models running the Wayland window server and remote shell (terminal) access on all Raspberry Pi models.
I hope you learned to set up Raspberry Pi remote desktop using these different methods. By understanding these options, you gain incredible flexibility in how you interact with your Raspberry Pi, making it truly accessible from anywhere.
- Www Vegamovies Com Hindi Dubbed Your Ultimate Guide To Bollywood Entertainment
- Camilla Araujo Naked Unveiling The Truth Behind The Sensation
- Marlene Santana Hot Photos Videos On Erome
- Understanding Barron Trumps Height Does He Have A Height Disease
- Unlocking The Power Of Ymaal A Comprehensive Guide To Revolutionize Your Digital Experience

How to remote into your Raspberry Pi from a Windows PC - YouTube
How to Setup Raspberry Pi Remote Desktop - Pi My Life Up
How to Setup Raspberry Pi Remote Desktop - Pi My Life Up
